Wednesday, June 26, 2013

June 2013 MemoryWorks Express Kit Projects


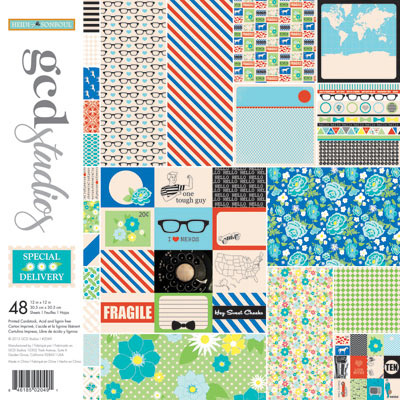
June 2013 MemoryWorks Express Kit - Summer Lovin'

Patterned Paper
{1} 12x12 Feeling the Breeze – I Heart Summer (Simple Stories)
{1} 12x12 Smooth Sailing – I Heart Summer (Simple Stories)
{1} 12x12 Daydream – I Heart Summer (Simple Stories)
{1} 12x12 3x4 Journaling Cards – I Heart Summer (Simple Stories)
{1} 12x12 4x6 Journaling Cards – I Heart Summer (Simple Stories)
{1} 12x12 4x4 & 6x8 Elements – I Heart Summer (Simple Stories)
{1} 12x12 2x12 & 4x12 Elements – I Heart Summer (Simple Stories)
{1} 12x12 Bingo Cards – I Heart Summer (Simple Stories)
Solid Cardstock
{1} 12x12 Grapefruit Bliss (Bazzill)
{1} 12x 12 Walnut Cream (Bazzill)
{1} 12x12 Kraft (Bazzill)
{1} 12x12 Apricot (American Crafts)
Embellishments
{1} 12x12 Expression Stickers (Simple Stories)
{1} 12x12 Fundamental Stickers (Simple Stories)
{12} 6x8 Package SN@P! Pages (Simple Stories)
{2} 3x4 SN@P! Cuts Die Cut Cards – Assorted Styles (Simple Stories)
{2} 4x6 SN@P! Cuts Die Cut Cards – Assorted Styles (Simple Stories)
{1} 6x12 Chipboard Sticker Shapes (Simple Stories)
{1} Flair Badge – Assorted Styles (Simple Stories)
{3} 6x8 SN@P! Chipboard Dividers (Simple Stories)
{5} 1 ¼ x 2 ¾ Shipping tags (MemoryWorks)
{4} Mini Binder Clips (MemoryWorks)
{2} 1 ¼” Metal Book Rings (MemoryWorks )
{1} Scoop Teal, Red & Orange Buttons – Assorted Sizes & Styles (Buttons Galore)
{1} ½ Yard Seafoam Dot Ribbon (May Arts)
{1} ½ Yard Orange & White Stripe Ribbon (May Arts)
{1} ½ Yard Red Dot Ribbon (May Arts)
{1} ½ Yard Yellow Chevron Twill Ribbon (May Arts)


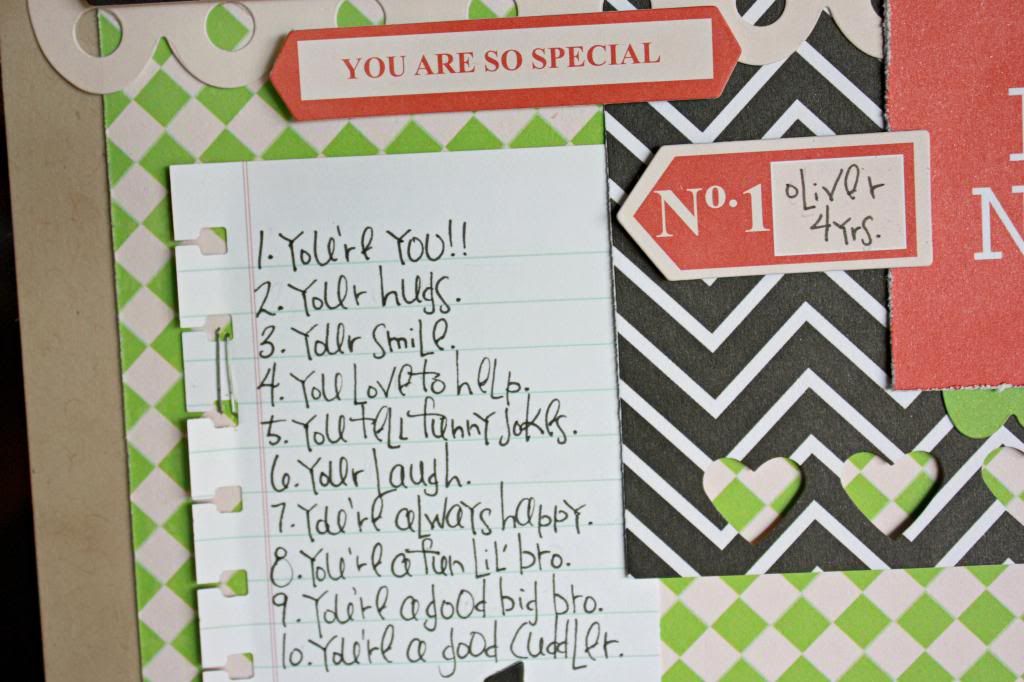
I had the super fun job of creating projects for MemoryWorks with the Express Kit this month......And, oh my goodness! All the goodies from the I Heart Summer collection from Simple Stories in this kit made had me drooling.  It has very quickly become my new favorite product line. Here is what I came up with...


Layouts:

Oval Beach
I don't make a lot of mini albums, so I love using the 6x8 pages as a starting point for layering on my pages.  I also really enjoyed those little die cut flashcards...so fun!!

Poolside
Here, again I used a 6x8 page, and I also cut up the bingo card patterned paper to add to my layers.  It turned out a bit busier than my usual, but I still like the look.


Cards:

Hello
This was probably my favorite die cut flashcard.  I knew that I really wanted to use it, and decided that I liked it best on a card.

Let's Ride Away
Oh my, I LOVE, love this little bike. This little flashcard made for a super quick and cute card.

Hook, Line & Sinker

This was the very first card that I put together. It started out with just one section of the fish border. The second one (the one under the line), was an after thought...I think it looks so much better.

Add a Little Sunshine
That polka dot ribbon is the cutest...I loved all of the ribbon that came in this kit :)


Altered Project:

Summer Mini Album

  The kit included a package of chipboard album dividers, page protectors, and book rings. So, I used them to put together a little Summer Mini. Like I said, I don't use mini albums...so this will probably end up being a gift for somebody.

I had so much fun with this month's kit! FYI, even if you don't subscribe to the MemoryWorks Express kits, you can still order them individually.  So, if you're interested for the month of June, don't hesitate to contact me :)

Thanks for looking!


Pin It!

Tuesday, June 25, 2013

GCD Studios - Fun Corner Technique


Hi! I'm sharing a very girlie layout today featuring the Special Delivery collection by Heidi Sonboul.

Geek is Chic:


This line was PERFECT for this photo of my niece from Halloween last year.  Isn't she the cutest little nerd?


I knew I wanted to do a 'photo corner' look around the whole pages, so I started with that...and than just built everything up from the center.


I measured approximately 2 3/4 inches from each corner, and used a 1/2 inch circle punch to cut notches.


Next...I cut 2, 3 inch squares, embossed them, cut them diagonally, and adhered them to the corners with foam tape. I then topped them off with some thin ribbon...tucking them into the notches.


I thought this was a great way to make the page look 'finished' without looking too busy :)  
Thanks for stopping by today!


GCD Studios Products Used:
Special Delivery 12x12 paper - George #2037
Special Delivery 12x12 paper - Heidi #2041
Special Delivery 12x12 paper - Calvin's Race #2039
Special Delivery 12x12 paper - Jack #2043
Special Delivery - Die Cut Border Strips #2055
Special Delivery - Label Stickers #2052
Special Delivery - Alpha Stickers #2051
Special Delivery - Paperclips #2054
Special Delivery - Brads #2053
Happiness - Glitter Epoxy Dots #1868


See this post on the GCD Studios blog here.
Pin It!

Monday, June 24, 2013

Color Combos Galore #245 - Sunny Sensations


We have a gorgeous summery palette at Color Combos Galore this week, and the Inspiration Board if full of trendy prompts, like feathers, and triangles! We're still playing a bit of catch-up, so technically this is week #4 for May...

Hello:

Inspiration Photo/Focus On Trend: Feathers
(used feathers)
Other Inspiration:
Inspiration Photo #1: visually similar flower stamps (idea: flowers in vase);  Inspiration Photo #2: polka dot paper (idea: wood chip circles); Inspiration Photo #3: circular tag reinforcement (idea: circle tab on placecard) 


Supply List:

Stampin' Up! - Cardstock (Whisper White); Stamps (Fabulous Florals, Long Stemmed); Ink (Tangerine Tango, Summer Sun, Close to Cocoa); Linen Thread; Punches (1/2 & 1/4 inch)
GCD Studios - Patterned Paper, Sticker, Border
Touch of Nature (JoAnn Fabics) - Feather

Be sure to stop by the Color Combos Galore site, and check out the amazing projects from the rest of the Design Team...and remember the deadline has been extended for all of May's challenges to June 28.  


Thanks for looking!


Pin It!

Wednesday, June 19, 2013

Read Me If You Like a Good Testimony :)


Hi there! We're going to take a little break from the crafty world for today, and talk about something way more important :)  Don't get me wrong, I'm all about the paper & glue...but I've got something to share, and I hope to be a blessing, and maybe even a little help to somebody.
I'm going to start out by saying that I was raised Baptist...IFB to be a little more specific. Even though I still attend a Baptist Church, there are a few differences.  But, we can talk more about that later.  I think this story begins, though, around the time I was 5 or 6 years old (I'm guessing).  I remember being in a Sunday School room being led through the "Roman's Road".  I honestly don't remember much about it, or even who was with me...But, it was when I made my first "Profession of Faith".  Soon after that, I remember realizing that now I needed to be Baptized...so, I went forward in church, and was Baptized.  Neither one of those events were encouraged by my parents (not that I recall, anyway).  I think they were things that I just realized I needed to do on my own.
Fast Forward to a few years later (I'll be saying that a lot), probably about the time I was 8 or 9 (?) years old.  I went forward in church again...unsure of my salvation.  Again, I don't recall what was said or done.  But, I do remember my mom asking me afterwards "Do you feel better?" I told her yes, because I know I was suppose to feel better...but, honestly didn't feel any different. Then I was Baptized....again.
Theeeeeen a few year later (I know for sure I was 12 this time)...I told a friend that I was once again unsure of my salvation, so we went to the pastor's office together. This one I remember the most specifically.  Maybe because I was older, maybe because it's the most recent, but I think it's because of the way it affected my life.  I repeated a prayer...and remember going home so devastated.  I knew I needed to be saved, and I knew that wasn't the way to do it. I sobbed myself to sleep that night, praying and asking God for help.  This was the experience that I was convinced was my salvation for a long time.  But, as the years passed, and by the time I was in high school, I began to doubt that experience as well.  So, I began to doubt everything. Obviously I've done what I am suppose to do, and it's not worked...so it must not be real. So, my years in high school were a bit bitter and rebellious.
Fast forward to a few years later (see?), we move to Michigan and start attending a church (the one I still attend now).  It was the first time I ever heard things like "Easy believe-ism", and "Led in a prayer." All of the sudden things made sense to me, but now I'm bitter for a different reason. Years of being around "soul-winning", and the "Roman's Road"....and now we don't believe any of it?  It was a relief in that...now I knew why I was feeling everything I had been feeling...but difficult for me because of the hard times I was having for all of those years. I just want to say, I don't blame my parents for the difficulties I had....it was a learning experience for them, too. They weren't even raised in a Baptist Church, but, it was just how I was feeling at the time. Angry. Not only that, but now I knew for sure that I STILL wasn't saved.......And so I was stuck there for a long time.  Those little doubts about all of it even being real festering, not wanting to make yet ANOTHER false profession of Faith, knowing that I didn't really want any other type of lifestyle...this was all I had ever known.  So, I continue going to church, and trying to live right, and floating through life.
Here's where it starts to get interesting....
Back in 2011, we went to the Creation Museum. Which, as a whole was a really neat place. But, when I got to the Bible Preservation Room.....it was awesome. It brought me to tears....How could I not believe?  Fast forward through the next couple of years (there it is again!), I had several conversations with my parents. A few things that my mom said really stuck with me :"It's really not that complicated", and "Salvation is not unattainable." .....All of this brings me to last week, I can't remember which day  it was, but someone had posted a list of reasons why the Bible was the Inspired Word of God.  I read through it, and again was brought to tears....How could I not believe?
If you're still with me (I hope that you are!), here's the best part....Friday morning I went down to run on my treadmill.  After 10 minutes of running, I slow it down to a power walk to mop myself off.  I had sweat running down my face, snot issues, and really gross effects from mouth breathing (I know, pretty, right?).  I keep a paper towel folded in my tank top, but it really just wasn't cutting it for all that I had going on.  So, I let my mind wander about ideas to keep a towel attached to my person, so that I wouldn't have to hang on to it, maim myself, or stop all together to use it. I promise, this all has a point.......I then come up with an idea, a catchy name for it, decided I'm going to make a prototype, sell it to Nike, and become a millionaire. (Disclaimer: I don't REALLY think any of that is going to happen...just daydreamin') As I'm thinking about these things, I think to myself, "But why would God ever bless MY life like that?" And then, there He was, and He said to me "Because I love you." I said "I know."  Honestly, I don't remember it word for word, but I know he dealt with my doubt, and unbelief.  I remember realizing that my life was nothing without Him in it.  I told him that I just wanted to serve Him with my whole heart.  I asked Him for help...then I asked Him to save me, and He did :)


Pin It!

Tuesday, June 11, 2013

The June 2012 Issue of The PaperCut


The newest issue of The PaperCut is now available...


...with a great Q&A section on the fabulous Heidi Sonboul :) 

My Layout is on page 16, here is a closer look:


GCD Studios Supplies:
Special Delivery 12x12 paper - Scott's Stamp Collection #2047
Special Delivery 12x12 paper - Guido #2042
Special Delivery 12x12 paper - Zach #2048
Special Delivery - Die Cut Borders #2055
Special Delivery - Alpha Stickers #2051
Special Delivery - Label Stickers #2052
Special Delivery - Brads #2053
Special Delivery - Paperclips #2054


I've been annoying myself lately by doing pages with only one photo...Typically, I like to include 2 photos on my pages. But, sometimes I just have one photo to use....this has been the case quite a bit recently.  On this page, though...you could easily substitute another photo for one or both of the flashcards, and still have a well balanced multi-photo layout.

I'm always so humbled looking through this publication...and honored to be a part of such an amazing team!

Thanks for looking!


Pin It!

Sunday, June 9, 2013

Color Combos Galore #244 - In the Navy


We're doing a little catching up for weeks 3 & 4 of May at Color Combos Galore! So, this is week 3...and the extended deadline is June 30.


What a gorgeous Inspiration Board, I love where it took me....


 To You From Me:

Inspiration Photo/Focus On Patterns: Chevrons
(used chevron patterned paper, chevron border)
Other Inspiration:
Inspiration Photo #1: diagonal patterned paper (idea: straw); Inspiration Photo #2: floral stamp (idea: floral pattern on pillow); Inspiration Photo #3: blue buttons (idea: visual compositon of paint and can)

Supply List:
Stampin' Up! - Cardstock (Whisper White, Baja Breeze); Ink (Cameo Coral, Night of Navy); Rhinestones; Punches (1/2 and 1/4 inch hole, tag corner); Die (Square Lattice for 'leaves'); Stamp (Whimsical Words)
GCD Studios [Indian Summer] - Patterned Paper (stripe, chevron)
Fancy Pants [Summer Soire] - Stamps
Bloomerie (Etsy Shop) - Bakers's Twine
unknown - buttons

You've got 3 weeks to participate with this one...so make sure you fit it in!


Thanks for looking!


Pin It!

Thursday, June 6, 2013

GCD Studios - Die Cut Border Strips


Hi! Today I'm sharing a layout using Heidi Sonboul's Special Delivery.  I just love all of the possibilities with this collection...it really is great for every member of the family.

Hello Cuteness:


For this layout, I focused on using up some of the die cut border strips.  Of course these strips are great as borders...but they are also handy for layering, drawing the eye, and underlining titles or journaling.


I used 4 different borders for this project...here I used one to ground the photo, and a couple of label stickers.


I used a tiny bit of a green border to help make this flashcard stand out a little better...and used the rest of it under the title.


That neutral, intricately cut border was perfect behind this paperclip...really makes it pop!


I hope I've given you some good ideas for those super cute die cut borders.....don't be afraid to use 'em up!


GCD Studios Products Used:
Special Delivery 12x12 paper - Jack #2043
Special Delivery 12x12 paper - Calvin's Race #2039
Special Delivery - Die Cut Borders #2055
Special Delivery - Alpha Stickers #2051
Special Delivery - Label Stickers #2052
Special Delivery - Paperclips #2054


You can see this post up on the GCD Studios blog HERE.


Pin It!

Monday, June 3, 2013

MemoryWorks June Corporate Website Inspiration Projects

Hi everybody....I can't believe that it's June already! I had the awesome job of creating the Corporate Inspiration projects for the MemoryWorks website this month, you can see it up here.  I was given Simple Stories' Urban Traveler to complete the projects....


I LOVED this collection. This wouldn't normally be something that I'm drawn to, being that we don't travel a whole lot.  But, I find these are the times I'm pushed out of my box...and ended up creating some of my favorite projects :)  Here is what I came up with...

Road Trip:

“Road Trip” 8.5x11 Layout  – Kelly Holbrook, MemoryWorks TeamWorks Member
Materals List:
1.  Simple Stories: Urban Traveler Collection Kit (SS2900)
2.  Simple Stories: Urban Traveler Simple Basics Paper Pack (SS2906)
3.  Simple Stories: Urban Traveler 6x12 Chipboard (SS2927)
4.  Simple Stories: Urban Traveler Brads (SS2926)
5.  Simple Stories: Urban Traveler Layered Stickers (SS2928)
6.  Simple Stories: Urban Traveler Sn@p Pages (SS2922)
Optional Materials: 
·         Border Punches
·         Staples 
Instructions:
1.  Cut background paper to 8.5x11
2.  Cut 4 inch circle from pp, and adhere aproximately 1 inch from left, and 3 inches from bottom of page. Adhere, and staple down Sn@p page to the center and about 1/4 inch from left of page.
3. Punch a 6.5 inch border from patterned paper, and adhere/tuck slightly under Sn@p page, center of background paper.
4. Adhere 4x6 journal card center and approximately 1/4 inch from right of background paper.
5. Punch decorative edge onto a flashcard, and stick down center and about 4 inches from bottom of background paper
6. Adhere matted 4x6 photo slightly overlapping flashcard and center of page. (About 3/4 inch from top of page)
7. Add title and journaling to journal card, and embellish.  


 Congrats Grad:

“Congrats Grad”  Card  – Kelly Holbrook, MemoryWorks TeamWorks Member
Materials List:
1.  Simple Stories: Urban Traveler Collection Kit (SS2900)
2.  Simple Stories: Urban Traveler Brads (SS2926)
Optional Materials: 
Craft Cardstock
Embossing Folder
Instructions:
1.  Emboss card base.
2.  Trim border strip down to 5.5 inches, and stick down about 1/4 inch from right side of card.
3.  Embellish flashcard, and adhere down about 1/4 inch from left, and bottom of card.
4.  Place 3 brads along top of flashcard, just before border strip.


College Freshman Survival Kit:

“College Freshman Survival Kit” Altered Item – Kelly Holbrook, MemoryWorks TeamWorks Member
Materials List:
1.  Simple Stories: Urban Traveler Collection Kit (SS2900)
2.  Simple Stories: Urban Traveler Simple Basics Paper Pack (SS2906)
Optional Materials: 
·         Ribbon
·         Border Punch
    1/2 and 1/4 inch hole punches
     Navy cardstock
      Large Gusset Bag 
     Instructions:
1. Fill bag with contents, and staple shut.
2. Cut patterned paper down to 8.5x11, and punch decorative edge onto both 11 inch sides, and add border sticker to one side (front).
3. Add letter stickers/title and embellishment stickers along right of front side, and stick onto gusset bag.
4. Adhere 2, 1/2 inch circles punched from cardstock to the center of front side, and punch with 1/4 inch hole punch. ( You now have reinforced holes)
5.  Thread ribbon through holes along with embellished tags/contents description, and tie a bow.

Kit Contents and Description:
Message Center - To always get your messages.
Pad of Paper - To write down your thoughts.
Starburst, Extra (gum) and Batteries - For that 'extra' 'burst' of energy to keep going.....and going.
Smarties and Nerds - Believe in yourself, and channel your inner 'nerd'.
Peanuts - It's ok to go a little 'nutty'.
Good & Plenty - For 'good' times, and 'plenty' of success.
Erasers - Each day is new.
Paperclips - To hold it together.
Highlighters - To 'highlight' your skills.
Skittles - For a colorful experience.
Calculator - To 'sum' up: Do your best!!


Thanks for looking!


Pin It!